Skip to content
💥10-20% OFF SPC Flooring - Buy More, Save More!

DECKO Tiles Installation Guide


Firstly, please watch the following video, as it is the most efficient way to acquire information:

These guidelines are recommendations and it is our customers liability to undertake the installation with caution and safety to prevent any accidents during install.

Pre-install checks:

  • The outdoor area you will be laying DECKO Tiles on is a hard and flat ground such as: concrete, pavers, existing wooden deck, hard packed road base etc.
    • Dirt/Grass areas can be prepared for DECKO Tiles by removing the grass layer; laying road base gravel; compacting this road base gravel; and laying weed-mat down over it.
  • You have calculated, or have gotten a calculation done by us on the exact number of tiles you need. Try our online Tile Calculator Tool: Decking Tiles Calculator — DECKO Tiles Australia
  • Your outdoor area has adequate drainage
  • Choose a design to lay your tiles: all inline, checkered or any other creative pattern you can think of.

Installation:

Installation of DECKO Tiles is simple, quick, and normally does not require any glue, screws, fasteners or specialty tools, only a wood cutting tool of your choice (handsaw, circular saw, jigsaw, drop saw etc.) to make cuts at the end of your area.

  • Choose the best corner to start from, usually it is best to begin with the most exposed outside corner of your area - start with ramp edges if you have these - and make your way in toward the building. Make cuts at the walls to hide the cut sides of the tiles.
  • Place each tile and edge piece one by one, interlocking them into each other. The interlocking system is symmetric so all sides can interlock into all others, meaning you can choose whatever design you like for your area.
  • Lay all the full tiles first, leaving the tiles that require cuts last, such as ones against walls, edges, posts etc.
  • Make cuts as required, and make sure to check if any off-cuts can be reused at another location, as our quotes consider offcuts larger than a 1/2 tile to be reused.
    • For straight cuts a circular saw, handsaw, dropsaw or similar is recommended; for curved cuts or complex cuts use a jigsaw or similar.
    • Before making a cut, please check the cutline on the bottom of the tile, to make sure there are no screws in the way, if there are, please remove them prior to making the cut.
  • You may wish to use DECKO Tiles as fascia, or to cover existing stairs. In this case you will require "Liquid Nail" glue or similar.
    • Use many 'dots/blobs' of glue on the bottom of each tile to stick each one on the vertical surface or stairs.
    • There are many ways of overlapping the horizontal and vertical tiles for a beautiful outcome, below are a couple of photos for inspiration:
  • After installing, it is recommended to hose down or pressure wash the tiles as this will help in removing a layer of dust left on the surface from the factory. Especially on covered areas this can leave sediment marks after a light rain.


Disclaimers:

Safety First - Handling & Care of DECKO Tiles: Our 12.5 kg carton boxes contain up to 11 tiles and it is safe to handle and transport in this way. The carton boxes are manufactured in an eco-friendly way from recycled paper. Please recycle the boxes by disposing of them at your local card board recyclers or placing them in the recycling bin.

When tiles are stacked on top of each other during install they can slip, so do not walk on stacked, piled or loose tiles. 

Please store DECKO tiles in the box in a dry area until installation to keep the integrity of the boxes for handling, even though the product inside is waterproof. 

Skin contact: If skin or hair comes in contact with dust from the product, wash with soap and water.

Eye contact: If dust enters the eyes, wash out immediately with water. In all cases of eye contamination, it is a sensible precaution to seek medical advice.

Transform Your Outdoor Space with Decko Deck Tiles

Transform Your Outdoor Space with Decko Deck Tiles.

Discover the simplicity of transforming your outdoor spaces with our comprehensive guide to installing Decko deck tiles. Perfect for beginners and DIY enthusiasts alike.

Step-by-Step Guide to Creating Stunning Steps and Fascias

Installation Steps

Recommended Tools:

- Drill/screwdriver with Phillips head

- Angle Grinder with cutting wheel/hack saw/cide cutters

- Polyeuthane Based Glue / Liquid Nails

Step 1 - Screw removal

Step 1 - Screw removal

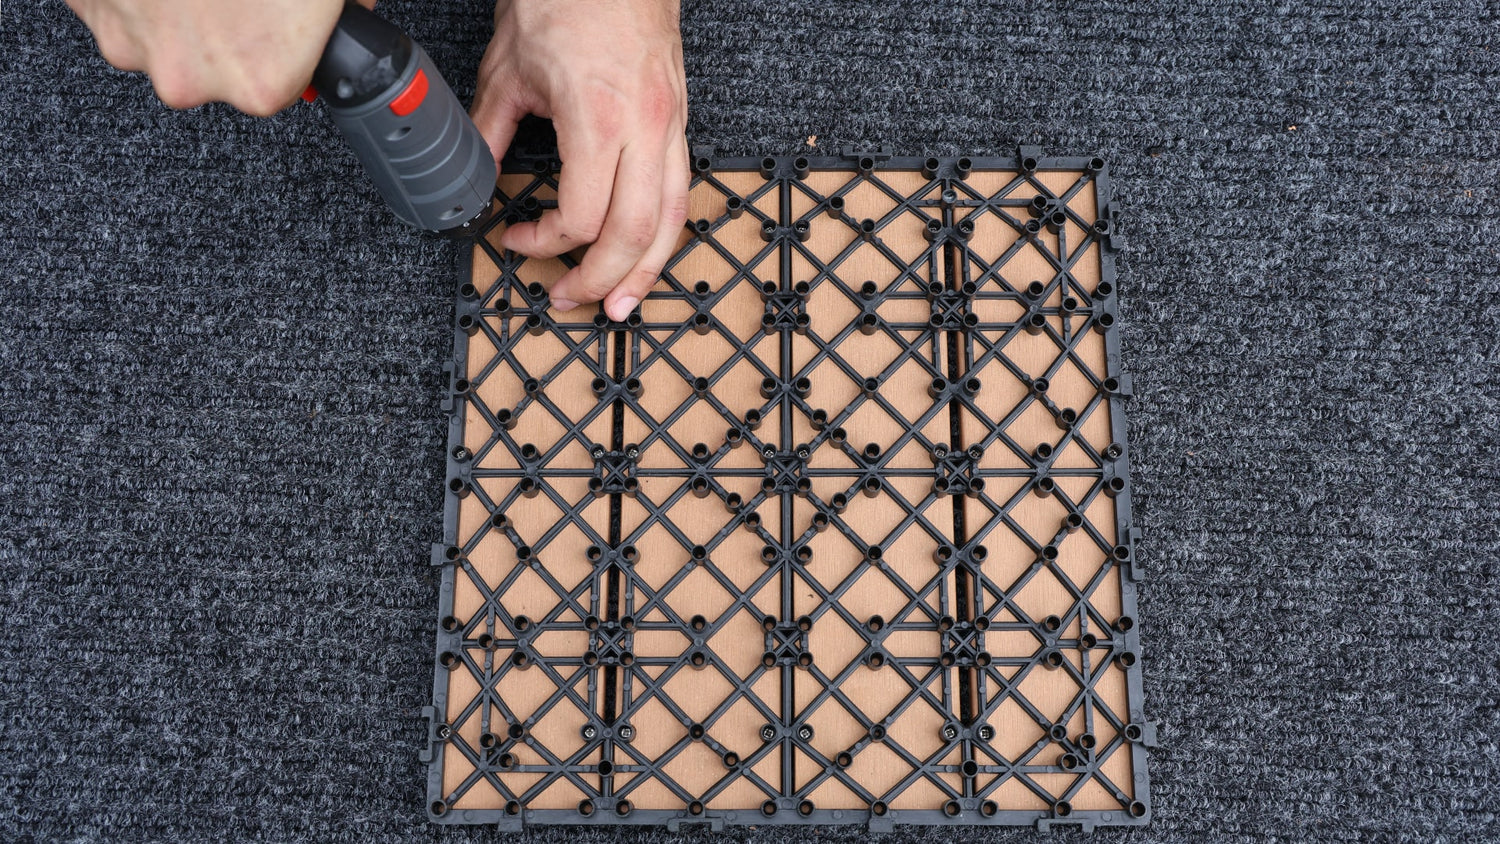
Locate the three screws at the very edge of the Decking tile. Using the appropriate screwdriver or a drill with the right bit, carefully remove these screws. This step is essential for preparing the tile for a custom fit on your steps.

Step 2 - Relocate screws

Step 2 - Relocate screws

Once the screws are removed, you will reposition them. Place the screws back into the tile but further inside, ensuring they are evenly distributed. This repositioning helps in securing the tile firmly while accommodating the step's edge.

Step 3 - Prepare the line

Step 3 - Prepare the line

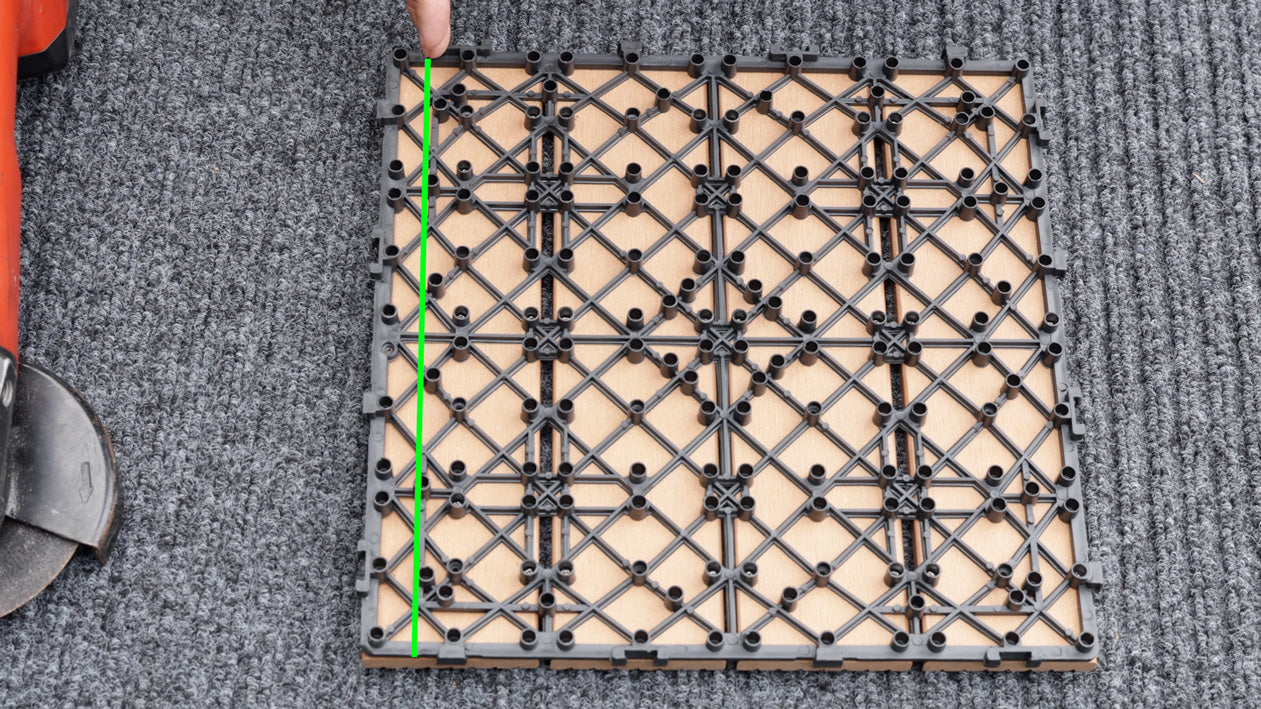
To fit the tile onto the step perfectly, you might need to trim or adjust the edge of the tile. Depending on the tool you have, you can use a hack saw, a grinder with a cutting wheel, or side cutters for this task. If using a grinder, ensure it’s equipped with a cutting wheel suitable for the material of your Decking tile.

Step 4 - Cut plastic mesh support

Step 4 - Cut plastic mesh support

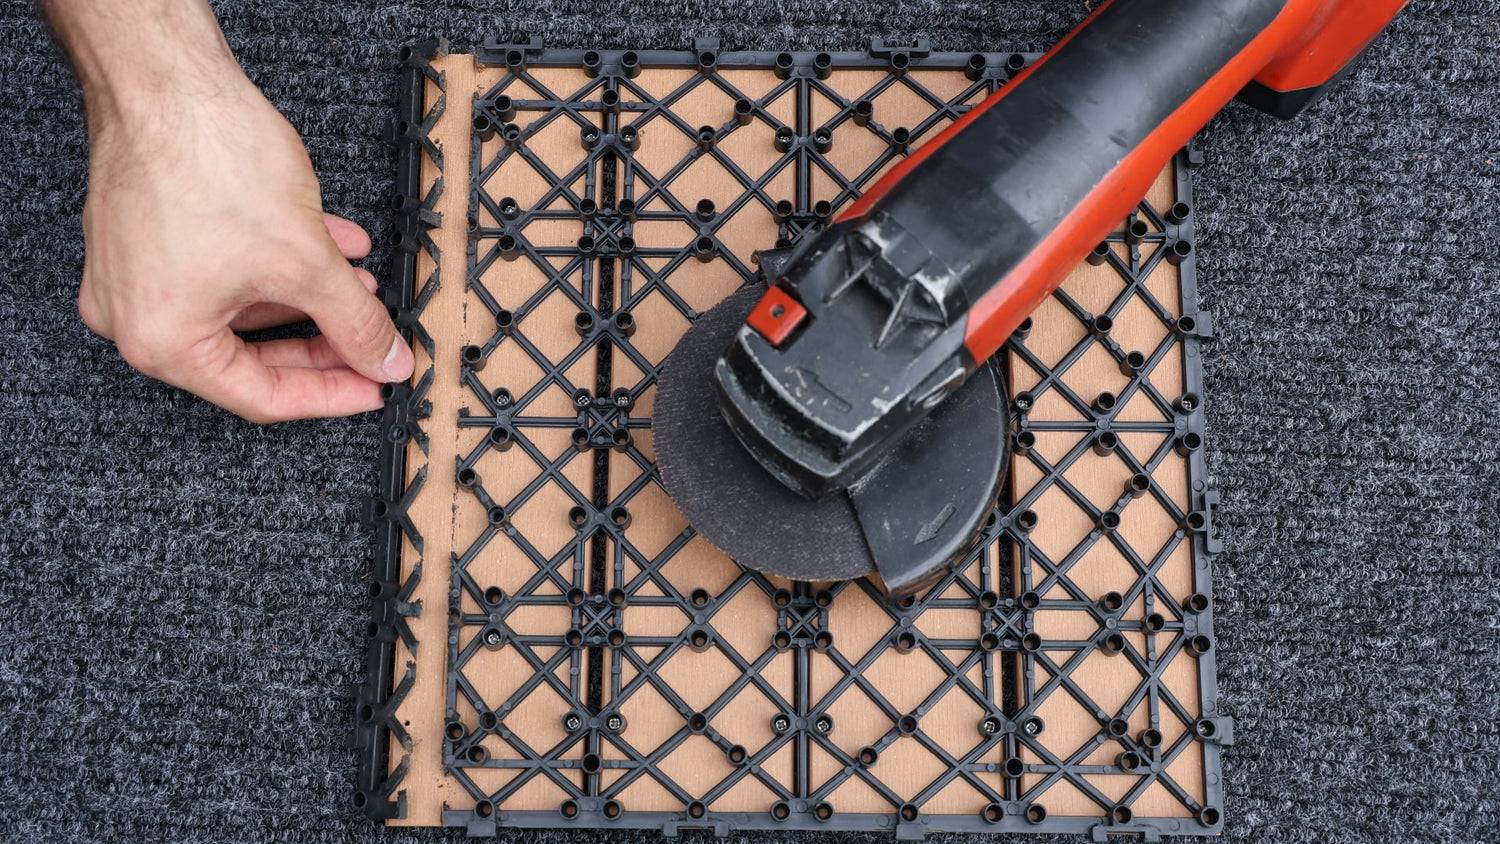
Carefully cut along the base mesh ensuring you don't cut into in the tile.

Step 5 - Prepare step and install

Step 5 - Prepare step and install

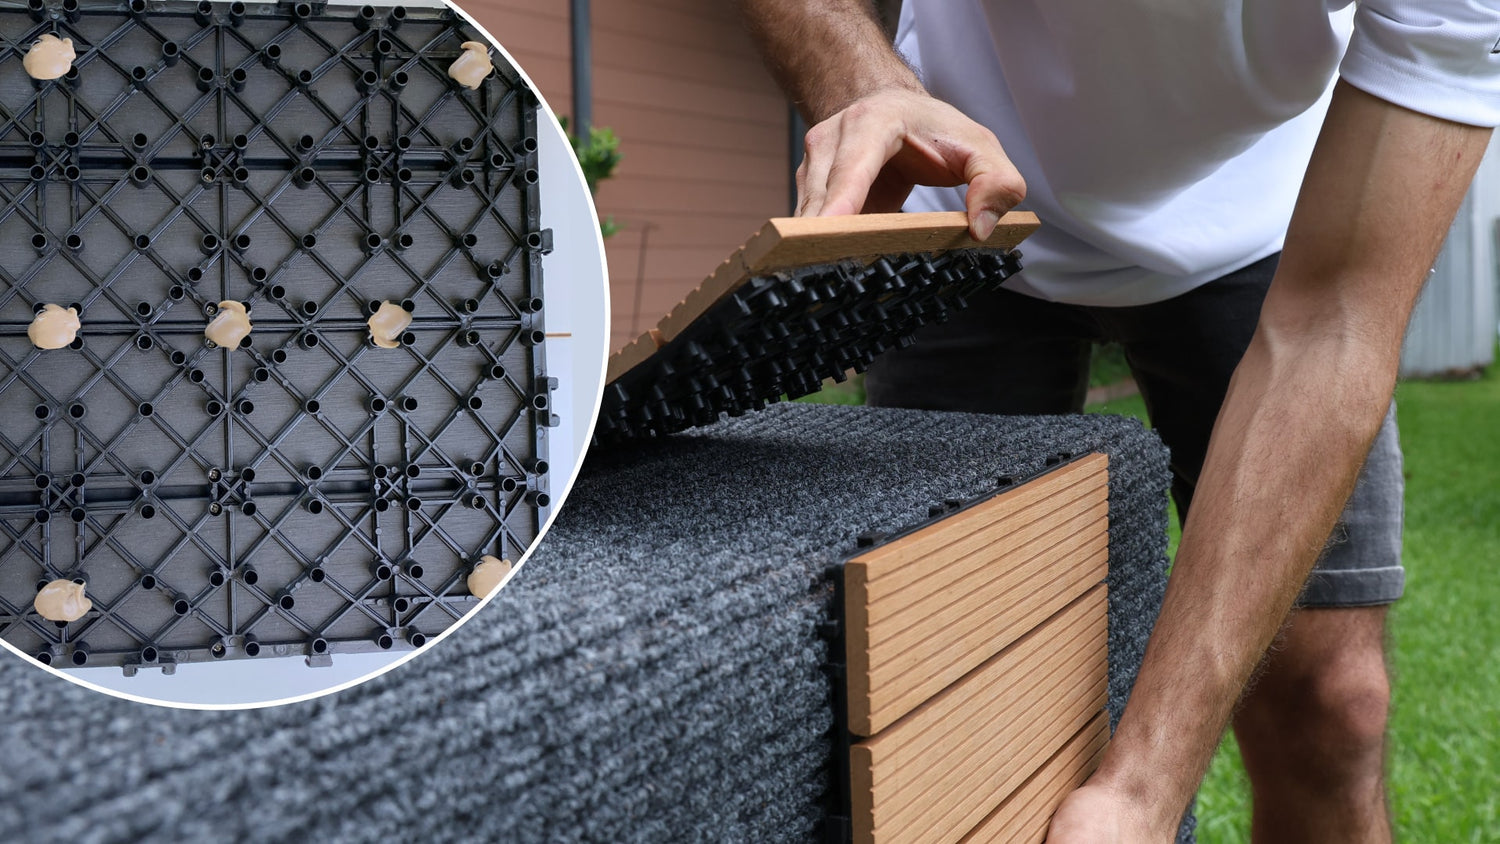
Apply a polyurethane-based glue to the bottom of the tile that will be placed vertically. Ensure that that you place large dots of glue across the tile, like in the image. After preparing the edge and applying the adhesive, carefully place the tile on the step. Ensure it is aligned properly before pressing down firmly. Allow the adhesive to cure as per the manufacturer's instructions before stepping on it or applying weight.

Pro Tip - Sanding

Pro Tip - Sanding

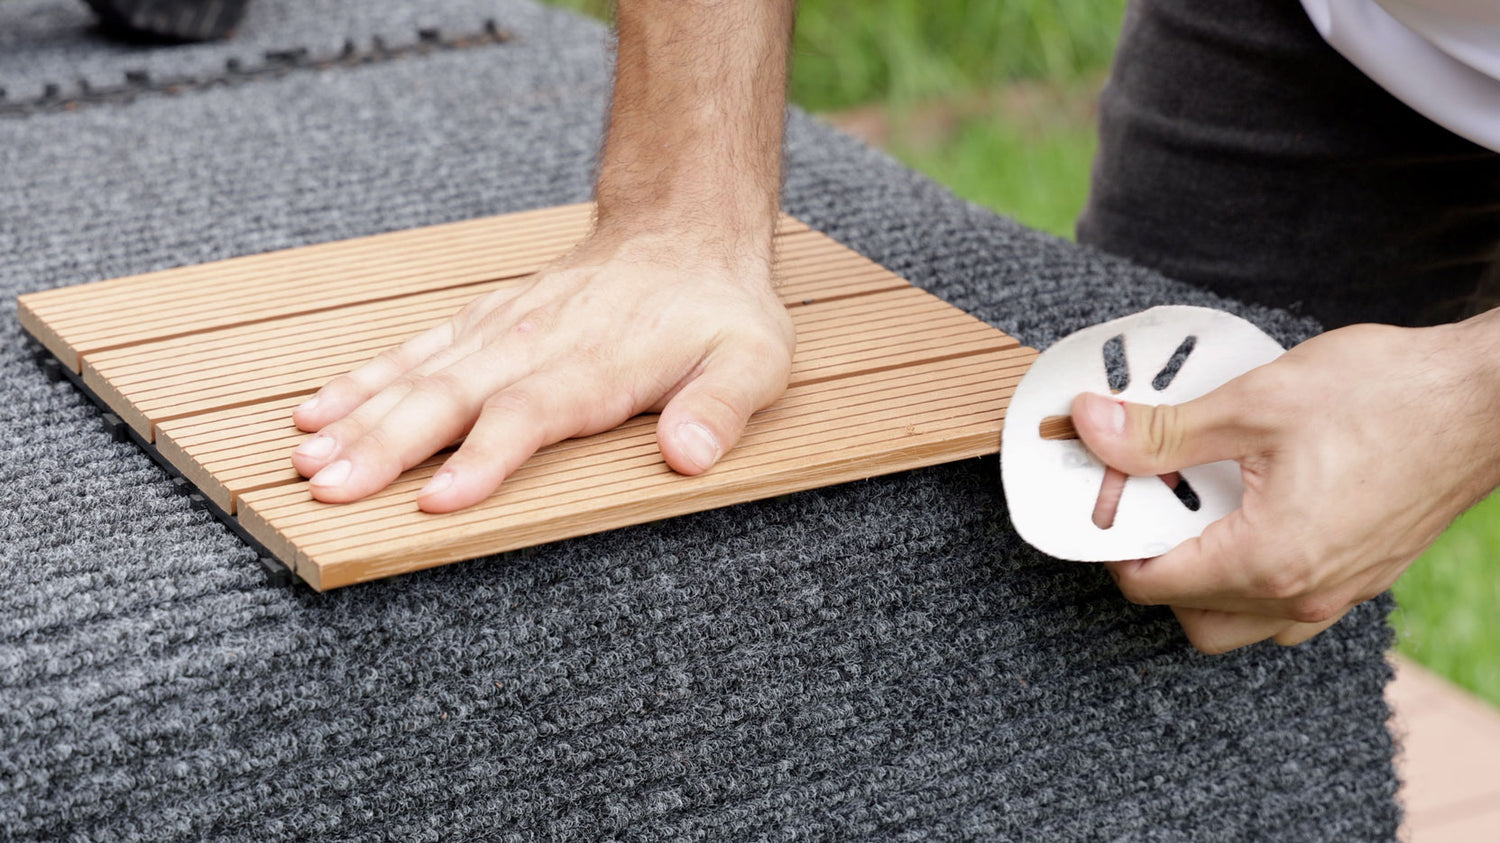
If you wish to match the edge of the tile to the rest of its brushed finish, sanding is required. Use 60 grit sandpaper to sand down the edges or any part of the tile you adjusted. This will help in blending the modification seamlessly with the rest of the tile's surface.

Things to Note:

  • Tiles may come dusty from the factory.
    - A thorough hosing is required.
  • Do not leave tiles in pooling water for weeks.
    - It may cause deformation.
  • Pressure washing is acceptable.
  • Outdoor cleaner is suitable although not necessary.
  • Scratches can be addressed by:
    - Using a 40-grit sandpaper.
    - Sanding along the grain.
  • For oil stains:
    - Use hot water and detergent.
    - Scrub with a sponge.
\n